

In the world of mushroom cultivation, we’ve always championed the convenience and accessibility that grow bags offer to beginners. These all-in-one solutions are a fantastic entry point for novices, providing an uncomplicated path to experiencing the joy and satisfaction of growing mushrooms. However, as cultivators gain confidence and look for ways to enhance their yields and cultivation experience, we invite you to consider taking the next step: transitioning from grow bags to monotubs with separate rye grain and CVG.
No fancy tubs, patches, liners, or hole-drilling is needed to level up your cultivation skills. This method maintains the spirit of simplicity but also opens the door to greater yields, control, and a deeper engagement with the cultivation process. (We call it the K.I.S.S. tek. “Keep it simple, Seismic.”)
Materials Needed:
- Sterile 2.5-pound rye grain bags with an injection port + 3 pounds of pasturized CVG
- Liquid culture or spore syringe
- Isopropyl alcohol (70%)
- Flame source (e.g., lighter or alcohol lamp)
- Gloves and face mask (optional but recommended for cleanliness)
- 2x I5-quart bins for the “dubtub” tek. (We like these affordable ones.)
Steps for Rye Bag Inoculation:
- Prepare Your Workspace: Clean the area where you’ll be working with isopropyl alcohol. Make sure it’s free from drafts and as sterile as possible.
- Sanitize Hands and Materials: Wash your hands thoroughly and put on gloves and a face mask if you have them. Wipe the injection port of t
he rye bag and the needle of the syringe with isopropyl alcohol. - Heat Sterilize the Needle: Using a flame, heat the needle of the syringe until it’s red hot to sterilize it. Allow it to cool for a few seconds before proceeding.
- Inoculate the Rye Bag: Carefully insert the needle through the injection port of the rye bag. Inject the liquid culture or spore solution into the bag. For a 2.5-pound bag, 2-5 CCs of liquid culture or spore solution is usually sufficient.
- Seal and Shake: After injection, remove the needle and gently shake the bag to distribute the inoculant evenly throughout the grain.
- Incubate: Store the inoculated rye bag in a dark, warm place (around 75-80°F or 24-27°C) for colonization. Check periodically for signs of healthy mycelial growth or contamination.
Why Liquid Culture is Often Better:
- Faster Colonization: Liquid culture contains live mycelium that can immediately start colonizing the substrate, leading to faster growth compared to spores that need to germinate first.
- Lower Contamination Risk: Since liquid culture is a pure mycelium solution, there’s a lower risk of contamination compared to spore syringes that might contain other spores or bacteria.
- Greater Consistency: Liquid culture provides a more consistent and reliable inoculation since you’re working with a known quantity of live mycelium.
Spawning to Bulk
Great! Your jar is fully colonized and you are ready to spawn to bulk. This is where the transition from grow bags to monotubs really shines.
At this point, your grain jars should be fairly contaminant resistant since they’re full of healthy mycelium. The CVG substrate provided is also contaminant resistant. Spawning to bulk does not need to be done in a SAB, but cleanliness still matters. Make sure your workspace, tools, and self are clean. Continue to use isopropyl and hand sanitizer when and where appropriate.
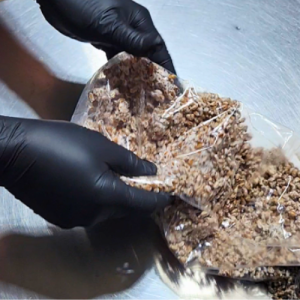
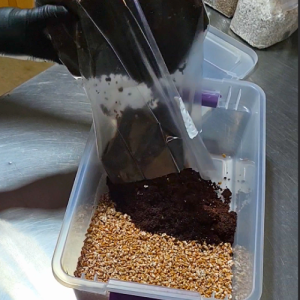
- Preparing Your Substrate: Mix and break apart your colonized rye grain inside the bag thoroughly. Cut open the bag with sanitized scissors and empty the contents into one side of a 15-quart tub. Next, empty roughly half of your CVG substrate into the empty half of the tub. (You’re aiming for a ratio of about a 1-to-1 CVG to spawn.)
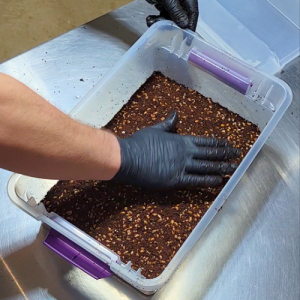
- Combining the Rye and CVG: Mix well with your hands, evenly distributing the grain throughout the tub. Gently pat down the surface to make it level. Once level, carefully tap down the edges with your fingers to close up the air gaps between the substrate and the side of the tub. This helps prevent side pins. (Note: Side pins get a bit of a bad rap. There is nothing wrong with them other than the hassle of harvesting them.)
- Casing Layer: With the remaining CVG, evenly apply a thin top layer no more than 1/4 in. thick to cover all exposed grain. Again, take a moment to level out the surface and tap down the edges.
- Hydrate: Directly mist the entire surface and sides of the tub for about 20 seconds. The water applied now will be all of the moisture the tub needs to get you into the next phase.
- Environmental Conditions: Put the lid on and place the tub somewhere clean and safe. Ambient light is fine. Dark closets are fine, too. Temperature matters the most. Aim for the low 70s at this stage.
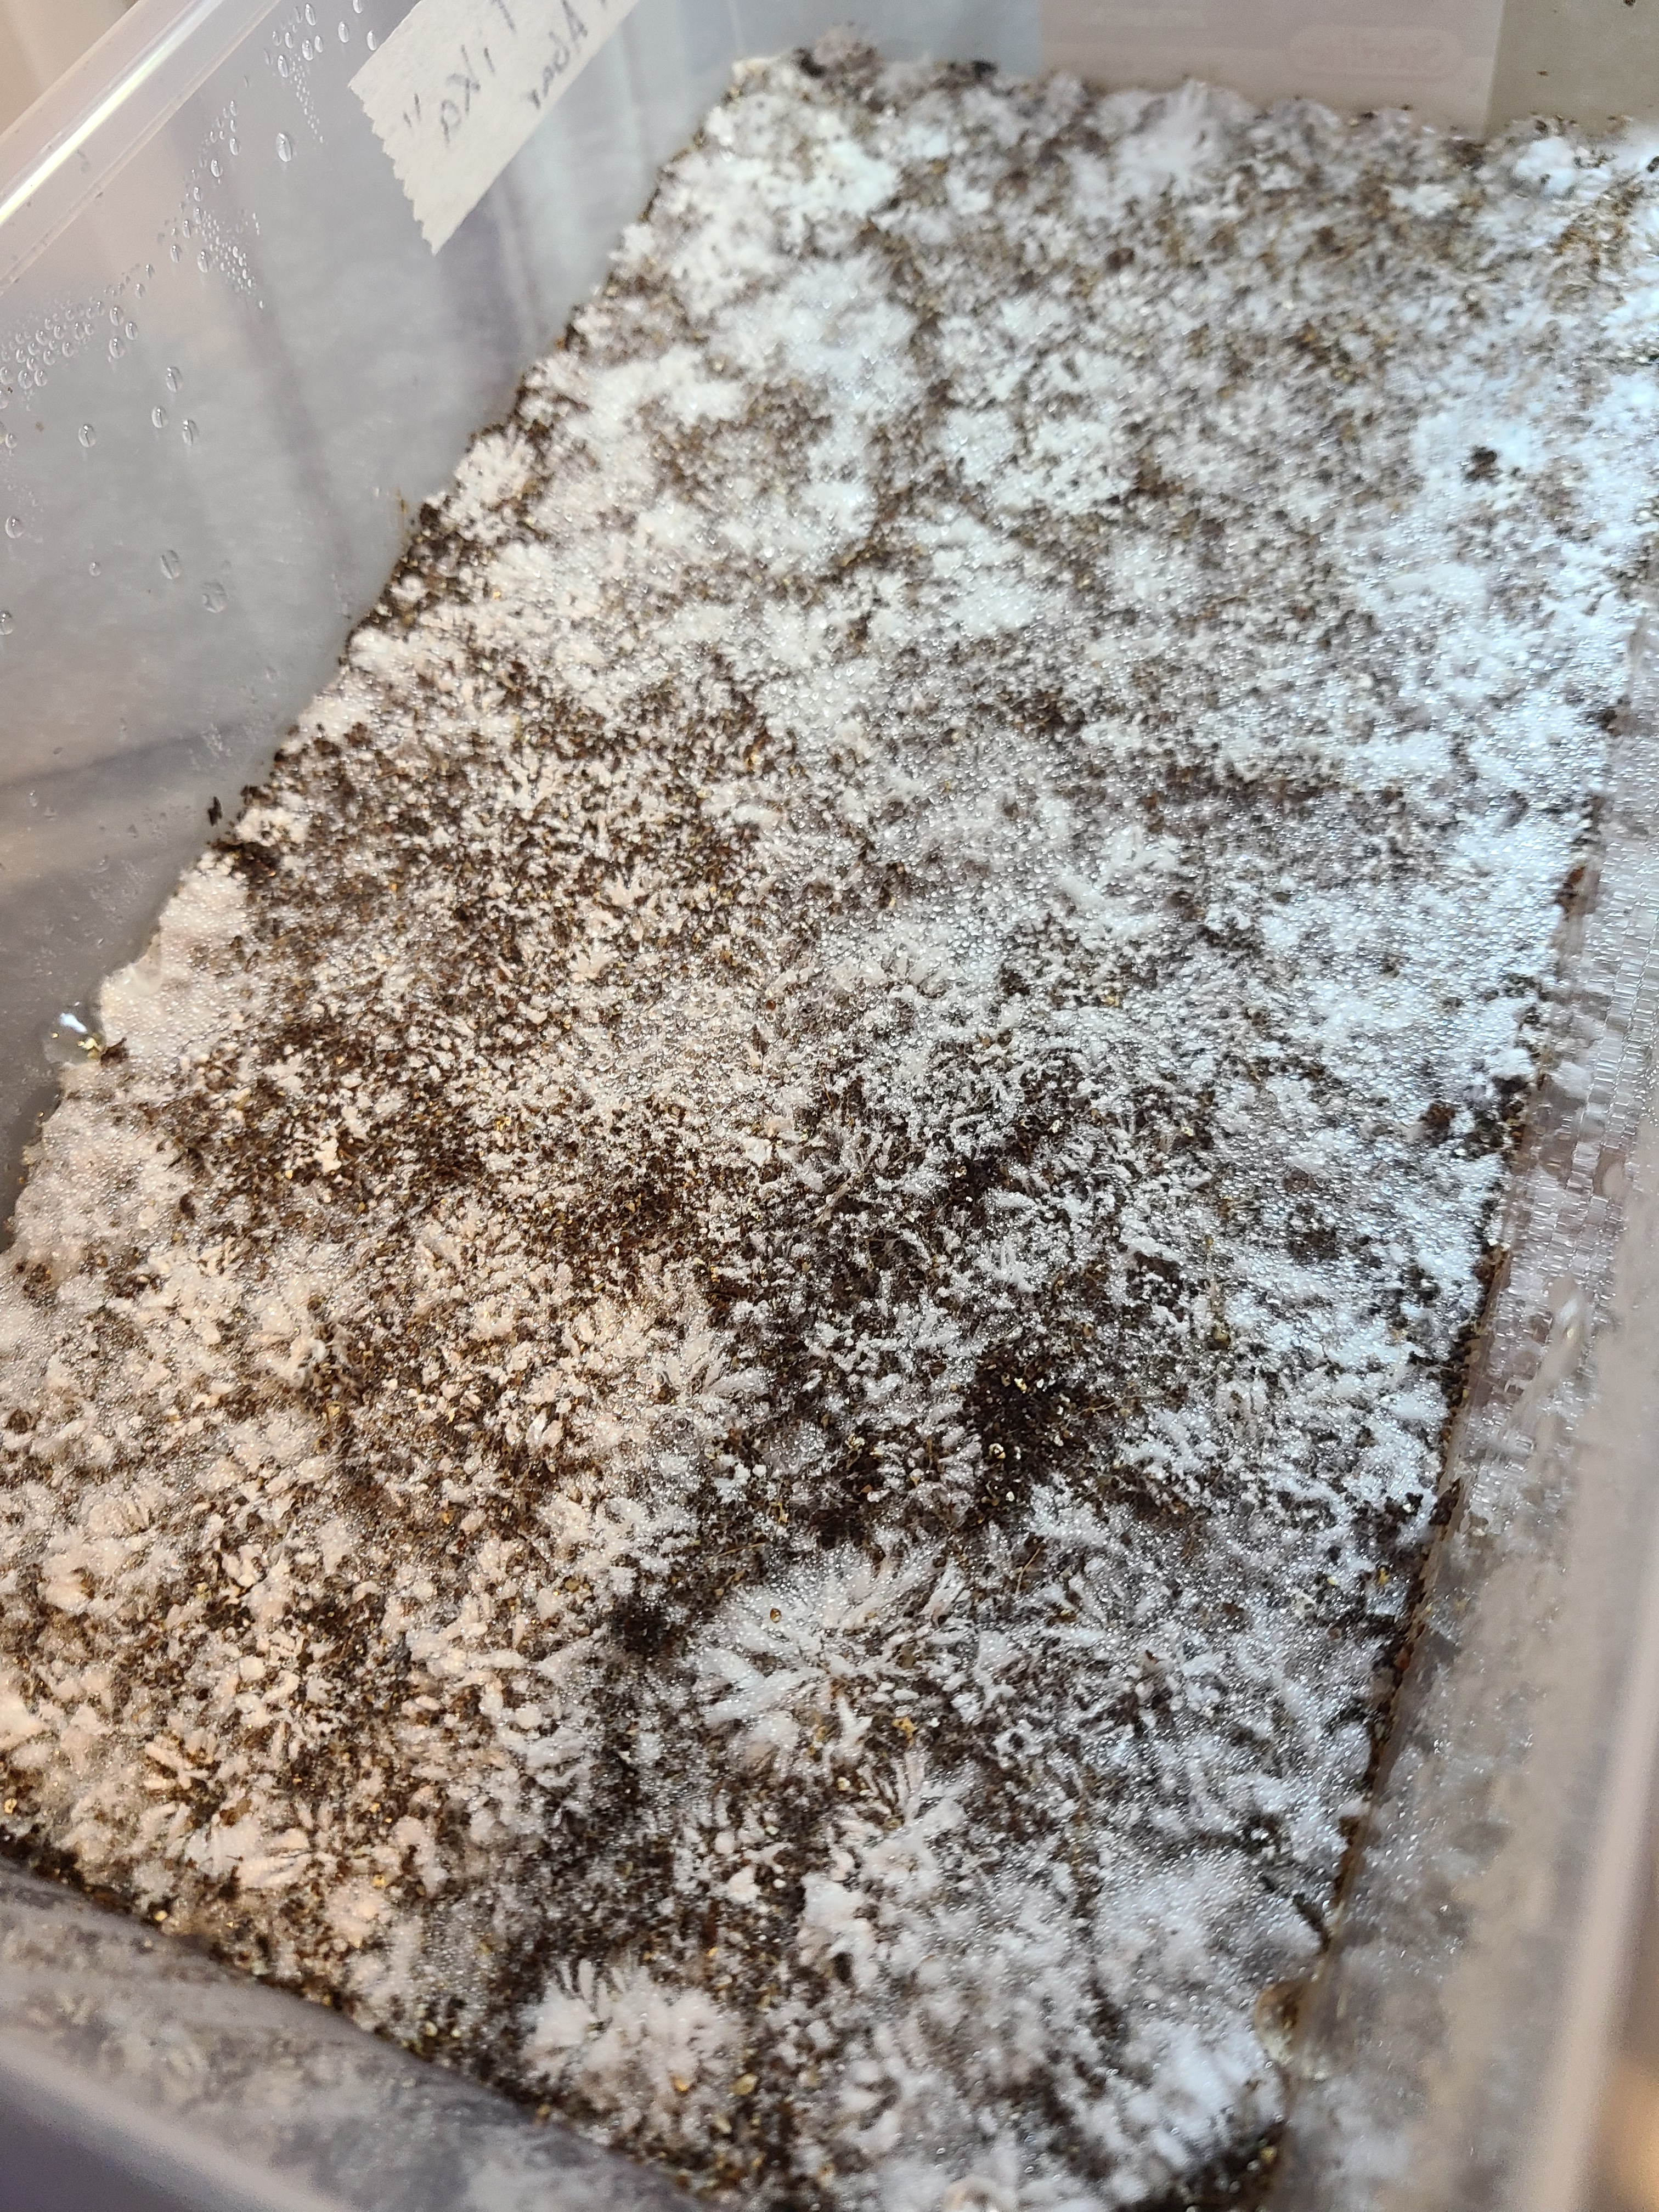
- Monitoring Your Spawn: Leave the lid on until the surface is fully colonized. This can take around two weeks. Depending on the type of mushroom, temperatures, and other factors at play, this timeline can vary widely.
Fruiting
Once your substrate is fully colonized, it’s time to transition to fruiting conditions (FC). During this phase, give your tub about 12 hours of ambient light. This is also the stage where fresh air exchange (FAE) matters. As your mushrooms begin to grow, they will breathe in oxygen (O2) and breathe out carbon dioxide (CO2) just like humans! In bins this size, FAE is as simple as flipping the lid upside-down before replacing it on the tub.
- When to Mist: At this point, your substrate may need to be misted 1 to 3 times daily, depending on your climate. A nicely hydrated tub will have little droplets that look like morning dew. Pooling is bad and means the tub is overhydrated. Surefire signs of a dry tub are a dry surface, some yellowing or browning, and the sides pulling away from the tub before pinning.
- How to Mist: When misting, don’t mist the substrate directly. It will bruise and can mat down the mycelium. Instead, hold the mister upside-down and allow the mist to fall onto the surface. If you over-mist and the water starts to pool up, a self-correcting measure is to introduce more FAE to help balance it out. The ideal hydration creates a biodome effect where the water evaporates and falls at a steady rate. Just like with all steps of mushroom cultivation, a hands-off approach is best—as long as conditions are okay. Another trick is to mist the sides and top of your monotub (and eventually dubtub).
- Fresh Air Exchange: As your tub begins to pin, you’ll want to increase the FAE. Simply flip the lid upside-down and place it on top of the tub. Small tubs don’t need a lot of air, so the air that exchanges through the gap of the unsealed lid is plenty. As your mushrooms continue to grow and the lid no longer fits over them, use the second container as an upside-down lid, doubling your mushroom growth space.
Harvesting
The culmination of your hard work is the harvest. Timing here is crucial for maximizing both yield and quality.
- The perfect time to harvest is when your mushrooms begin to veil or right after the veil breaks. This rule of thumb ensures that the mushrooms are harvested before the spores drop, which is messy and just not as aesthetically pleasing—but not a disaster.
- If you have a few over-achievers who need picked earlier than harvest time, go ahead and pick them.
- When it is time to harvest, the easiest way to do it is to float the cake. That is, fill the tub with water until the cake floats to the top, and harvest away!
- Cutting with scissors or twisting and plucking is both okay and comes down to personal preference.
- If you use the twist-and-pull, try not to take too much of the substrate with you, as a second flush is not far behind.
- From here, drain the water from the float.
- Direct mist the spent cake for 30 to 40 seconds and put the tub right back into the fruiting conditions outlined in Step 4!
- At this point, keep a close eye for any green molds that may pop up, as the harvesting and re-hydration steps can introduce contaminants
Congratulations!
Mushroom cultivation is an intricate dance with nature, requiring attention to detail and a deep understanding of the life cycle of fungi. By following these steps and maintaining a clean, controlled environment, you can maximize your yields and enjoy the process of growing mushrooms from spores to fruitful bodies. Whether you’re a seasoned grower or transitioning from beginner techniques, this transition from grow bags to monotubs offers a rewarding challenge.

0 Comments